Skip to content Skip to navigation

Site Retired

As of May, 2022, this website is no longer updated and has been replaced with a static copy.

Caryl J Westerberg's Blog Posts

Caryl Westerberg Posted by Caryl J Westerberg on Friday, May 31, 2013 - 9:00am

"Spam spam spam spam, spam spam spam spam, lovely spam, wonderful spam".  ~ Monty Python

Named after a lunch meat made of spiced ham, "spam" is used to describe unsolicited and unwanted bulk messages which are usually some sort of advertising. Sure you might be able to find a great deal on sneakers, but left unchecked, these messages clog up our email and fill up the comment sections on websites.

We use spam filters to eliminate these messages from our email, but what do we do about our websites?

There's a module for that!

The Drupal community has created several modules to help eliminate spam from websites including Akismet, CAPTCHA, Troll, Bad Behavior, and Spam. Here at Stanford Web Services, our favorite spam module, Mollom, was created by the founder and project lead of Drupal, Dries Buytart.

What is Mollom?

Mollom is an "intelligent" content moderation web service. By monitoring content activity on all sites in the Mollom network, Mollom is in a unique position to determine if a post is potentially spam; not only based on the posted content, but also on the past activity and reputation of the poster. In short, Mollom handles incoming posts intelligently, in much the same way a human moderator decides what posts are acceptable. Therefore, Mollom enables you to allow anonymous users to post comments and other content on your site.”

~ From Drupal.org:

How do I use Mollom?

Since the Mollom module on Drupal.org works with the Mollom service at mollom.com, you’ll need to have a Mollom account.  This is free for the basic service.  

Once you have a Mollom account, you’ll register your website on Mollom.com. Then, using the Mollom module on your website (you’ll need to enable it first), you’ll identify which forms on your website need spam protection.  

To learn more about Mollom, and for some great directions in configuring Mollom, visit Drupal.org here: 
http://drupal.org/documentation/modules/mollom.

Posted in:
Caryl Westerberg Posted by Caryl J Westerberg on Monday, March 4, 2013 - 9:03am

Stanford provides a flexible, easy-to-use web-based form service - a great free resource for site owners.  According to the Web Forms Service website:

"Stanford community members can use the Stanford Web Forms service to make contact forms, short surveys and polls, instructor evaluations, and other forms free of charge. No knowledge of HTML, Javascript, or SQL is required.

The form building application provides a selection of pre-formatted fields and elements, which makes it quick and easy to construct web forms. Data collected through the forms can be emailed to the form owner and/or stored in a MySQL database where it can be viewed through a secure web interface."

To learn more about Stanford Web Forms, sometimes know as formbuilder,  visit webforms.stanford.edu.

How do I create a Stanford Web Form?

  1. Visit formbuilder.stanford.edu
  2. Click on "Create New Form" and create your form.
  3. After creating your form, under the "Publish" tab, set the status to live.

How do I use the Stanford Web Form in a Drupal website?

You can embed your form into a web page using inline frames (iframe). On your Drupal website, embed your iframe into a text field such as the "body" field on a node. 

To embed the iframe in a text field:

  1. Turn off the WYSIWYG by selecting "Disable rich-text" or by selecting a text format that doesn't use a WYSIWYG (e.g., Plain text).
  2. Copy the web form URL from your live form or from the "Form URL"  field under the "Publish" tab in Form Builder.
  3. Replace the URL path in this HTML line of code with the  URL for your web form:
    <iframe src ="http://www.stanford.edu/dept/foo/myform.fb" width="100%" height="300"></iframe>
  4. On your website, paste the <iframe> HTML code into the text field of your content.
  5.  Save and test your form.

Troubleshooting:

  • If your site uses HTTPS, you'll need to change the URL in the iframe to use HTTPS as well.  It would look like this:
     <iframe src ="https://www.stanford.edu/dept/foo/myform.fb ....
  • If your web form doesn't appear immediately, wait a moment, it may still need a moment to load.
  • If it is still not showing up, it may be that the text format you are using doesn't allow iframe elements. Try using a different, more capable text format such as Full HTML.
  • If you need to configure your text formats to allow iframes on your Drupal 7 website visit:
    /admin/config/content/formats

More information

Posted in:
Caryl Westerberg Posted by Caryl J Westerberg on Monday, February 11, 2013 - 9:24am

The advent of open source technology brings a whole new world of opportunities previously unaccessible to most people. From general tools like web browsers such as Firefox and Chrome, to specific tools such as Audacity for editing audio, and Gimp for image editing. All of these tools are freely available through the internet. Drupal is another such open source technology. Drupal core, along with contributed modules and themes are all freely available through the internet.

What else is remarkable about open source technology is that documentation and training information is also freely available or available at a low cost for these technologies. For a example, Lynda.com provides short informative videos on all these technologies for $25 a month for all you can watch. They also provide a free trial for one month; perfect for quickly getting up to speed on one of these technologies.

The Drupal community also provides a plethora of documentation and training for Drupal. Many of the folks in the Drupal community provide websites with training information. A simple web search on a specific topic will often yeild all the information you need for learning about the latest error message on your site, a contrib module that seems to fulfil a requirement for your site, or a tutorial on how to make a theme work for your site.

Here at Stanford, we're have an number of Drupal resources. Here's a list of some of these resources:

Tech Training: Tech Training has just released a new series for using and building sites with Drupal. Check out the schedule for upcoming Drupal classes.

The User Guide for Stanford Sites: Here you'll find information on requesting and setting up your new Drupal site on Stanford Sites along with a number of step-by-step video tutorials.

Tech Commons: Here you can find an extensive list of Stanford-related Drupal resources. Members of the Stanford Drupal community also contribute posts about using Drupal at Stanford.

Drupaller's Mailing List: The Drupllers mailing list is open to all members of the Stanford Drupal community. You don't need a SUNET ID to join. On this list you can ask your questions and join in other email discussions about Drupal at Stanford.

Online Books: With your SUNET ID you can access Safari's online books for Drupal 7. Here are examples of some of the books you have at your finger tips:

Open source technology has opened the door to learning, growing and contributing. You can often find what you need to know with a couple of key strokes and mouse clicks. Drupal is one of those technologies. We have many resources available, especially here at Stanford.

Did I miss a resource for Drupal at Stanford?

Contact me at cjwest@stanford.edu

Posted in:
Tags:
Caryl Westerberg Posted by Caryl J Westerberg on Friday, January 25, 2013 - 6:46pm

Have you checked out Stanford's Event Calendar at http://events.stanford.edu? It has featured events, events from departments and student groups, and events by subject or type. It's a great place to find out what's happening around campus.

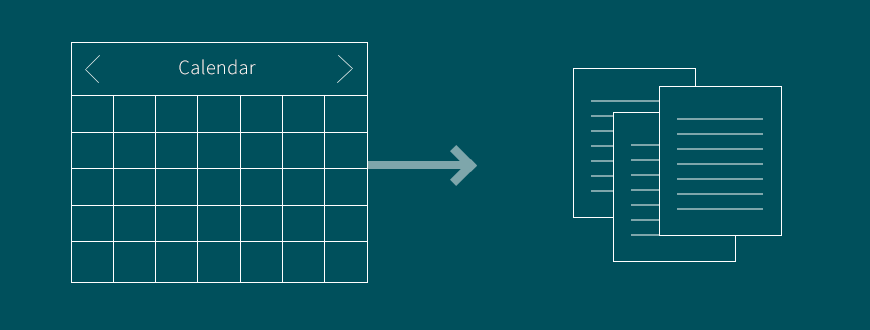
However, if you're like me, I don't always think to go to the website and check the calendar. Now, through the magic of RSS feeds and Stanford Event Importer 2.x, you can select your favorite event feed and have those events copied on to your website.

John Bickar at Stanford Web Services led the development of this convenient module for Stanford. If your website is on the Stanford Sites service, this module is already installed for you. Otherwise you can download it from Stanford Drupal Features server at: http://drupalfeatures.stanford.edu/project/stanford-events-importer

The Stanford Event Importer takes data from the Stanford Event Calendar feed, and then creates and populates event nodes on your site with the event information.  The event information can come from either a category or an organization on the Stanford Event Calendar. Here's how to put the Stanford Event Importer to work on your site.

Create the Stanford Event Importer and import events

To use the Stanford Event Importer you’ll need to create a Stanford Event Importer node, which will define the events to import.  

Before starting, be sure to have the following information ready:

  • Title of your Event importer
  • Category or Organization from which feed to import.  The Category corresponds to the “By subject” and “By type” items on events.stanford.edu.  Consider visiting events.stanford.edu, and counting approximately the number of items in the feed.  Then, when importing items, compare this number to the number of items imported.

Here’s how to create the event importer:

  1. From the Admin Menu, Navigate to: Content > Add content > Stanford Event Importer
  2. Enter the title of your importer.  
  3. Select either a category or organization for your importer 
  4. Scroll to the bottom of the page and select “Save”

Upon saving the new event importer, the importer will immediately import the items from the feed.  

Check your results:  

You may want to make sure that the events imported are the ones you expect:

  1. Select “Content” from the Admin Menu
  2. Under “Type” select “Stanford Event.”  
  3. Click on “Apply”
  4. If necessary, sort by date by clicking on the “Updated” column header.
  5. Select the most recent event and check that it reflects the information that you expected.  

Updating the importer:

Did you forget to add a tag to the events you imported?  Maybe you imported the wrong feed?  Not to worry. Here’s how to update or change the importer and the items you’ve imported:

  1. Find the Stanford Event Importer node you originally used to import the items.  You can do this by selecting “Content” from the Admin Menu
  2. Under “Type” select “Stanford Event Importer”
  3. Click on “Apply”
  4. Scroll through the list until you find the importer to update.
  5. Select the importer by clicking on the title
  6. Select the “Delete Items” tab
  7. Click on “Delete” on the confirmation page.
  8. Select “Edit”
  9. Make your changes to the importer
  10. Scroll to the bottom of the page and click on “Save” to save your changes.
  11. After saving, import the events with the new criteria by selecting “Import”
  12. Select “Import” on the confirmation page

Verify the import:

  1. Verify the number of nodes created corresponds with what you expect
  2. Verify your results as described in the section above under “Check your results”

Adding Taxonomy terms to Events

Once you have created your importer, you can add additional information for your particular website to the events as they are imported. For example, to add taxonomy terms to events, add the taxonomy term field to both the Stanford Event content type and to the Stanford Event Importer. On your importer nodes, select the terms:

  1. Navigate to Structure > Feed Importers
  2. Select your desired importer
  3. On the Importer Configuration page under the "Processor" horizontal tab, select "Mapping."
  4. Scroll to the bottom and from "Select a source," select the taxonomy field on the importer.
  5. From the "Select a target," select the taxonomy field for the event.
  6. Click on "Add"
  7. Scroll to the bottom of the page and click on "Save"

Now when you import your events, they will be tagged with the same terms as the importer.

If you like this module, check out its sister module, Stanford Courses, at https://drupalfeatures.stanford.edu/project/stanford-courses. It will import courses from http://explorecourses.stanford.edu.

Posted in:
Caryl Westerberg Posted by Caryl J Westerberg on Wednesday, December 19, 2012 - 9:26am

Getting a new Drupal site set up takes a few steps before you can begin building your site. Also, Stanford Sites is a little different than other hosting environments. One of the first things to tackle after creating your new site on Stanford Sites is setting up the accounts, roles, and privileges.

SUNetID versus admin

Each account on a Drupal site must have a unique email address.  If you used your SUNetID as the email address when requesting your site, this will be the email address for the admin (a.k.a. user 1) account. However, if you want to log in to your site using your SUNetID and Stanford's WebAuth, the admin account  cannot use that SUNetID email address. You may need address this by changing the admin account email address to something like: sunetid+admin@stanford.edu.

If , for some reason, you lost or forgot the password for the admin account, 

Note: if you're already logged into the site, you'll need to log out by navigating to https://mysite/user/logout. Substitute "mysite" for the name of your site. 

  1. Navigate to the user page at https://mysite/user
  2. Select Request New Password
  3. Enter admin for the username
  4. Click on E-mail new password

A one-time password reset link will be sent to the email account associated with the admin. Click on that link to log into your site. At this point you'll be able to change the password for your account.

To have admin privileges while logged in with your SUNetID, you'll need to add administration privileges to your user account. These privileges are defined through "Roles."

To add or change a role for any user account, visit admin/people or People from the admin menu.  

  1. Select edit for the user account you'd like to change.  
  2. Scroll down until you see Roles and select or deselect the desired role(s). 

If you want to add additional roles to your site, such as an "Editor," you can add them at admin/people/permissions/roles or from the admin menu:

People > Permissions > Roles

To define privileges for a role, visit the "Permissions" page at admin/people/permissions or

People > Permissions

With your user accounts, roles, and privileges set up, you can proceed with building your site!

Posted in:

Pages

Subscribe to Caryl J Westerberg's Blog Posts