Skip to content Skip to navigation

Site Retired

As of May, 2022, this website is no longer updated and has been replaced with a static copy.

Caryl J Westerberg's Blog Posts

Caryl Westerberg Posted by Caryl J Westerberg on Monday, May 5, 2014 - 9:08am

You have your Stanford site up and running, now you want other people to help you. Here's how to give them permission to edit your site.

Using WebAuth, Stanford has made it easy for you to use your SUNet ID and passord when logging into your Drupal site. Once a new user has initially logged into the site you simply need to upgrade the role for that user.

Have the new user log into the site

Start by having the new user log into the site through WebAuth using their SUNetID. If you don't see the SUNetID login on your page, you can login at /user (e.g. https://swsblog.stanford.edu/user). Click on SUNetID Login to login using WebAuth.

Change the new user's role

After your new user has logged into the site, 
  1. Log in to the site with an administrator account
  2. Navigate to the people page (admin/people) by clicking on People in the black admin menu bar.
  3. Scroll down until you find the name of the user you wish to update
  4. Click the edit link for that user
  5. On the user edit form, click on the appropriate role (e.g., administrator)
  6. Scroll to the bottom of the form and click the Save button
Have the new user log in to the site and check the new privileges.
 
Posted in:
Caryl Westerberg Posted by Caryl J Westerberg on Monday, March 10, 2014 - 8:18am

Suppose you're using taxomomy terms in exposed filters, and you want the resulting page to display one of the the terms as a title. Taxonomy term pages will give this to you very easily, but sometimes the taxonomy term page is not the right solution.  Here's how you can display the taxonomy term as the title of your views page.

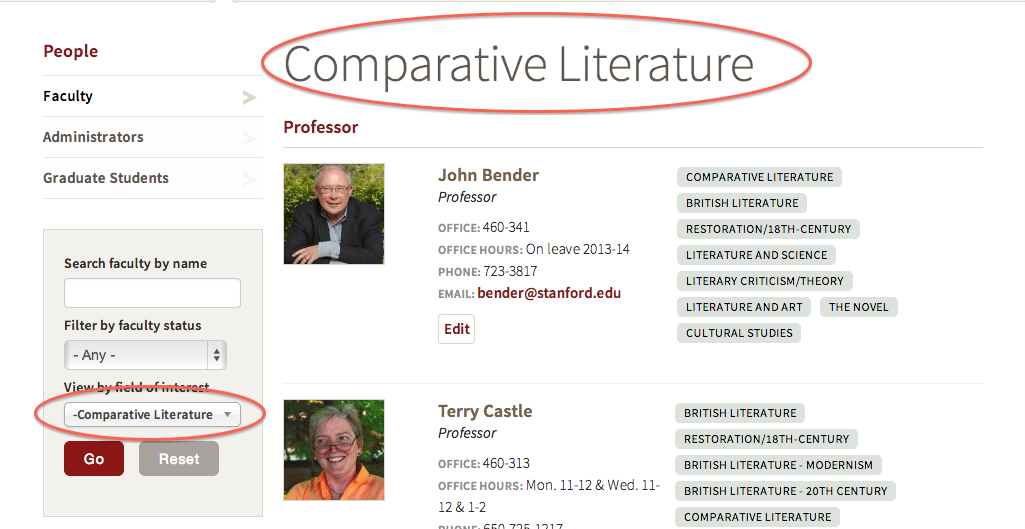
So, for example, the user selects Comparative Literature from the exposed filter. Along with displaying all nodes tagged with Comparative literature, you also want the page title to be Comparative Literature. To make this happen, you'll need to dig out your PHP skills and add a snippet of code to your view.


Some functionality you’ll need

Get the view object:

$view = views_get_current_view();

Get the value from the exposed filter:

$tid = $view->exposed_input['field_my_tax_tid'];  

In this case, ‘field_my_tax_tid’ is the machine name for the exposed filter field. You can find this field name in the URL after executing the exposed filter.

Get the term object and the human-readable name:

$term_obj = taxonomy_term_load($tid);
$title = $term_obj->name; 

Check that the term ID is set and valid

if (isset ($view->exposed_input['field_my_tax_tid'])) {
 $tid = $view->exposed_input['field_my_tax_id'];
 if (is_numeric($tid))

Set up the values to return

     $term = $tid;
     $term_obj = taxonomy_term_load($tid);
     $title = $term_obj->name;

Set the view title object

$argument->validated_title = $title;

Return the orginal term

return($term); 

If this term had not been set by the exposed filter the term should return all.

Code snippet example

$view = views_get_current_view();
$term = 'all';
$title = 'Default Title';
if (isset ($view->exposed_input['field_my_tax_tid'])) {
 $tid = $view->exposed_input['field_my_tax_tid'];
 if (is_numeric($tid)){
     $term = $tid;
     $term_obj = taxonomy_term_load($tid);
     $title = $term_obj->name;
 }
}
$argument->validated_title = $title;
return($term); 

Putting your code into the view

For your view, you'll need to adjust this code. Start by replacing Default Title with the title from your view, and field_my_tax_tid with the exposed filter field for your view.

  1. From with the Views UI under Conditional Filters add Content: Has taxonomy term ID.

  2. In the form under the section WHEN THE FILTER VALUE IS NOT IN THE URL select Provide default value.

  3. In the dropdown, select PHP Code. (Note: you must be logged in as user 1 for this option to be available.)

  4. Copy and paste your code snippet into the text block.

  5. Select Override title and place a %1 in the text field.

Save your view, or use Update preview to check out your result.

Troubleshooting

If you have the Devel module enabled, you can use the dpm() function to get other information such as field and variable names.

If "PHP Code" is not appearing as a selection on the view Contextual Filter Configuration form, enable the "PHP Filter" module. 

Posted in:
Caryl Westerberg Posted by Caryl J Westerberg on Monday, February 10, 2014 - 8:04am

Websites often link to pages on other websites – this is a great way to refer to relevant information from your site. However, problems arise when a page that people are linking to moves to a new URL in your site or elsewhere. The link that once worked is now broken.

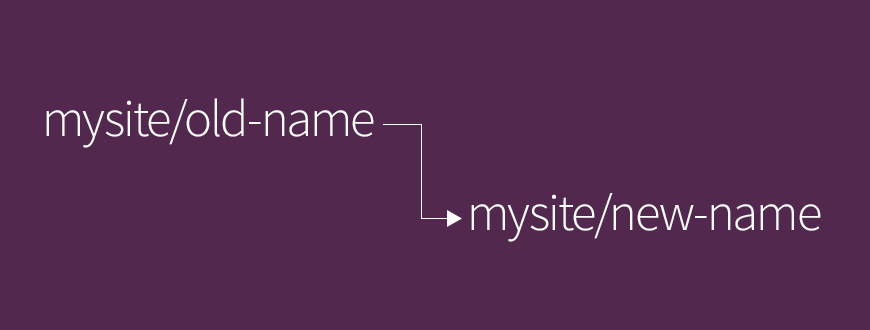
When a URL changes on your site, Drupal’s Redirect module helps you manage these these broken links with redirects. Now when you move a page you can use the Redirect module to redirect an old, non-functioning URL to a new URL.

  1. Start by enabling the Redirect module on the modules page (admin/modules)


  2. Navigate to the redirects page at Configuration > Search and Metadata > URL Redirects > (admin/config/search/redirect)


  3. To add a redirect click on the Add redirect link.  
  4. Add the old URL as the From. This is an internal link that you want to work, but doesn't (e.g., purple-monkey-dishwasher).
  5. Add the new URL as the To. This is the URL you want the From link to redirect to. Note that the To URL can be either internal or external (e.g., blog/redirecting-links-old-page-new-page or https://stanford.edu)
  6. Select Save.
     

Check it out! Navigate to the “From” URL (e.g., purple-monkey-dishwasher) and check that it redirects to the "To" URL.


Posted in:
Caryl Westerberg Posted by Caryl J Westerberg on Monday, December 16, 2013 - 1:03pm

Remembering your password can be tricky if you don't work with your Drupal site all that often. If you've forgotten your password on your Drupal site, it's easy to reset it. 

 
  1. Navigate to the user page at https://mysite/user (substitute your website name for "mysite.")
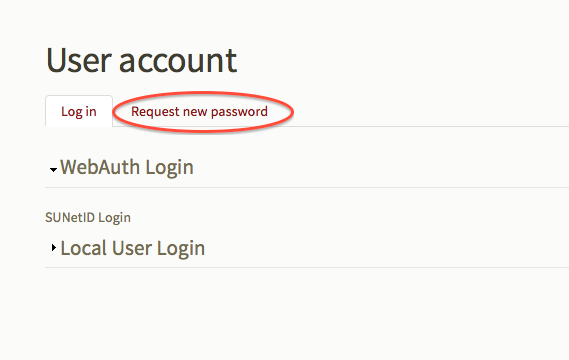
  2. Select Request New Password
  3. Enter either your username or email address for this site.
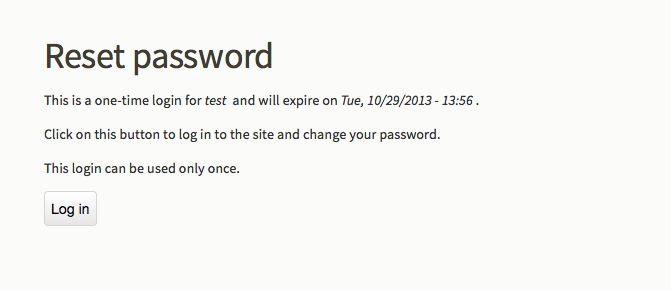
A one-time password reset link will be sent to your email account. Click on that link to log into your site. At that point, you'll want to change the password for your account to something more memorable (and still secure.) Check out IT Services' tips on creating a strong password.
 
 
Posted in:
Caryl Westerberg Posted by Caryl J Westerberg on Thursday, December 12, 2013 - 9:18am

Suppose you're getting ready to migrate your website from Drupal 6 to 7, or maybe you just inherited a site. You'll want do an audit to learn what content is on the site and how it is structured.  When it comes time for a site audit, it’s good to start with a sitemap. 

A sitemap is a list of the pages on a website. The sitemap may take many forms, from machine-readable XML, to an HTML listing of page names, to a text list of all the page URLs. For a content audit, both the HTML listing and the text list give you not only an excellent view into the content, but a good idea of the structure of the site as well.

The quickest and most thorough way to build a sitemap is to generate it automatically.  Several free tools on the web will do this for you. One of my favorites is http://www.xml-sitemaps.com. It will generate a sitemap for sites up to 500 pages.

Generate a sitemap

To generate a sitemap:

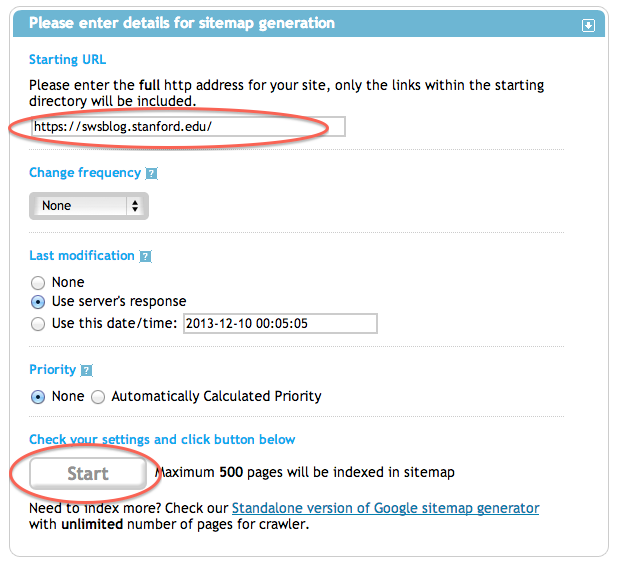
  1. Navigate to http://www.xml-sitemaps.com.
  2. Enter the URL for your website. Note: If your site uses https instead of http, you’ll need to enter the ‘s’.
  3. Click on the ‘Start’ button to have it crawl the pages on your site.

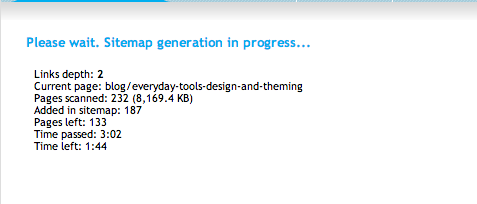
When you click on start, it will visit all the pages on your site, and make a list of all the URLs.

Download your sitemap

After a few minutes, or longer depending on the size your site, it will produce a list of sitemaps in different formats for you to download. For a sitemap consisting of HTML links, download sitemap.html. For a sitemap consisting of URLs, download urllist.txt.

Check your results

Here is a sample of the HTML sitemap (sitemap.html):

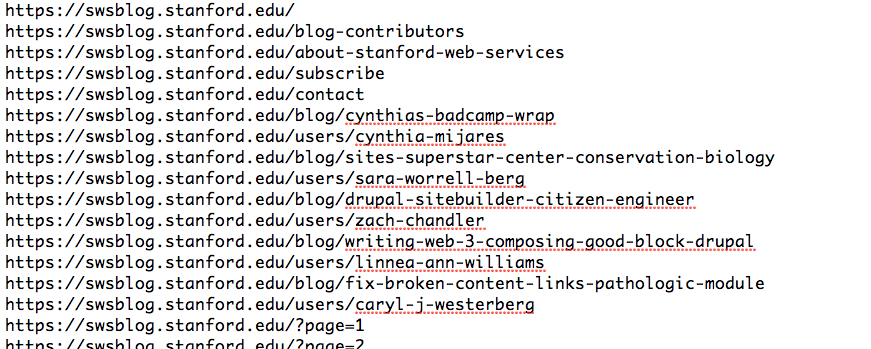
And a sample of the text format (urllist.txt):

Once you have this list of pages, you can copy and paste them into an Excel spreadsheet. From there, you can track and review each page of your site. 

More resources

XML-sitemaps.com is one of many tools on the web that can create sitemaps and assist with auditing your site. Other audit tools include:

Content Insight: This is a more comprehensive audit tool that provides information such as screenshots and page-level details.

Sleuth: This free tool which runs on a Windows machine will crawl a site and report broken links.

What is your favorite?

 We'd like your help! We'd like to compile a list of favorite content audit tools.  Please share your tips and favorites in the comments below. 

Posted in:
Caryl Westerberg Posted by Caryl J Westerberg on Tuesday, November 12, 2013 - 10:24am

Have you ever needed to change the URL for your website? Say, move your website from one domain to another, from a subdirectory to the root of a web host, or even make a copy? Chances are, you’ll find broken links and missing images in the text of your content.

Although Drupal handles internal links, like menus, wonderfully, internal links in text areas like WYSIWYG fields are not handled as gracefully. For example, if a site is moved from one domain to another, from a subdirectory to the root of a web host, or if a page is moved in the URL hierarchy, the links in the text areas may no longer be accurate. How can you find and update all of those broken links?

We have Pathologic to the rescue!  Pathologic is Drupal’s solution for fixing broken links and paths to images in the text areas of your site, and this handy module is available in Stanford Sites.

How Pathologic works

Drupal defines text formats to control formatting and processing when editing text and HTML in a text area. These text formats define filters and formats to be applied when text is output to the page. To learn more about text filters visit Text Filters and Input Formats.  For example, a Text Format may use an input filter to close all HTML tags before saving content.

Similarly, Pathologic provides an input filter that detects links in a text area and adjusts the links when you’ve moved your site or changed your URL. That is, it takes URLs from the previous site location and updates them for the current site location. The URLs that Pathologic will update include links and paths for images. Note that since Drupal filters text on output, your original text remains the same;  Pathologic will change the URLs when the page is rendered for display.

Configuring Pathologic

Before making any changes to the URL for your site, you’ll want to configure Pathologic.

Start by installing and enabling the Pathologic module

To enable the module:

  1. Navigate to Modules (admin/modules)
  2. Search for Pathologic
  3. If not checked, check the box for Pathologic
  4. Scroll to the bottom of the page and click on Save configuration

Enable WYSIWYG (optional)

If you will be using a WYSIWYG editor, you'll want to enable and configure that first. For those sites hosted on Stanford Sites, we use the Stanford WYSIWYG module available on Github. This module can be enabled following the directions for enabling a module above, substituting the "Stanford WYSIWYG" module for  the "Pathologic" module. The Stanford WYSIWYG provides the "Content Editor Text Format" referenced below. However, you can configure Pathologic for any text format.

Add Pathologic to desired Text Formats

  1. Navigate to Configuration > Content Authoring > Text Formats (admin/config/content/formats)


  2. Select configure for the text format you want to configure, (e.g. on Stanford Sites, you’ll probably want to configure "Filtered HTML" or on a Stanford Jumpstart Site, “Content Editor Text Format”)

  3. On the configuration page, scroll down to Enabled filters

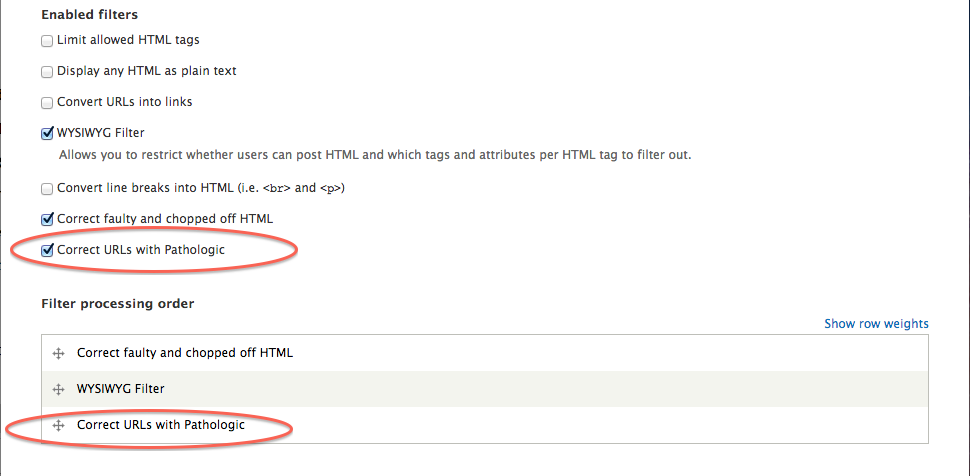
  4. Check Correct URLs with Pathologic

  5. Under Filter processing order, if necessary move Correct URLs with Pathologic to be the last filter in the list


  6. Under Filter settings, select the Correct URLs with Pathologic horizontal tab

  7. In the text field, enter the URL paths of the current and previous installation of your site (e.g., https://sites.stanford.edu/mysite/)

  8. If this Text Format uses a WYSIWYG, enter the full subdirectory path with slashes at the beginning and end (e.g.,  /mysite/)

  9. Enter "/" in the "all base paths for this site" section. That way, you can enter "/foo/bar/baz" in the WYSIWYG link editor and it will get filtered to "https://sites.stanford.edu/mysite/foo/bar/baz" 

  10. Scroll to the bottom and click Save configuration

  11. Navigate to a page with an image or a link, and check that it is displaying as expected

Adding links

With Pathologic configured,  these links will render equivalent results (https://sites.stanford.edu/mysite/news):

  • https://sites.stanford.edu/mysite/news
  • /news
  • news
 

To add a link to text in the WYSIWYG

  1. Select the text to display
  2. Click on the link icon to bring up a link dialog box
  3. Paste the destination URL into the URL field
  4. When the URL is within your site, you may enter the local URL (e.g., "news") without an initial "/". Then, in the Protocol drop-down, select <other>


Additionally,  when your site URL goes from being in a subdirectory (e.g., https://sites.stanford.edu/mysite/) to a vhost (e.g., https://mysite.stanford.edu), Pathologic will replace the string "sites.stanford.edu/mysite" with the string "mysite.stanford.edu" when the links are output for display.
 

Troubleshooting

If images are still not displaying properly, you may need to clear the cache for your changes to take effect.  

To Clear the Cache

Visit Administration > Configuration > Development > Performance (admin/config/development/performance) and clicking the Clear all caches button near the top of the page.

More Information

For more information on Pathologic, visit the Drupal.org project page at: https://drupal.org/project/pathologic, and read the documentation at https://drupal.org/node/257026.

Posted in:
Caryl Westerberg Posted by Caryl J Westerberg on Tuesday, October 29, 2013 - 2:48pm

Have you ever wanted to try something new on your website, but you were afraid it might go wrong and leave you with a broken site?  Or maybe you want a second website that is is a close match to an existing one? Creating a copy of your live (or "production") site gives you the opportunity to explore changes to its current configuration with less risk. This tutorial will show you how to create a copy (or "development") website using a backup of your production site.

Watch our video: "Using the Drupal Backup and Migrate module to create a development site" to demonstrate many of the steps below.
Please note that restoring a site using the Backup and Migrate module on the Stanford Sites hosting is now blocked as a security measure

Step 1: request the new site

If your site is in the Stanford Sites Drupal 7 environment, you'll want to request the new site first. You will receive an email when the new site is ready.

  1. Navigate to https://sites.stanford.edu
  2. Click the green Request a website button on the top right of the page to bring you to the Administer My Sites page
  3. Click Create a new instance for a group or department button
  4. If you are creating a development site, enter the name of your production site as the Website Short Name and append it with "-dev"
  5. Complete the remainder of the form. 

For more information on requesting a site, see Getting Started on Sites: How to Request a new Drupal Site

Step 2: prepare your current production site

1. Configure the Pathologic Module

Images and URLs in content are tricky to manage when moving or copying a site. Even though an image file is copied to the new site, its URL in the content may continue to reference the image in the old site, and you end up with an image that doesn't show up as it should. Configuring the Pathologic module will assist in converting links to point to the image files on the new site. Check out these directions for configuring the Pathologic module.

2. Log in as User 1 or Admin

The first user created on a Drupal site is called "User 1." This user has special privileges in Drupal. When using the Backup and Migrate module, it is best to log in as User 1. For websites on Stanford Sites, the User 1 account will have the name "admin." If you are logged in with your SUNetID, you will need to log out and log in as "admin."

Step 3: prepare your new development site

1. Check that you have the same modules

Your new site must have all the same modules and themes as the production site. If you are hosting your existing production and new development site on the Stanford Sites environment you should have all necessary modules available. Contact Stanford Web Services if you have questions regarding your site hosted on Stanford Sites. (One exception is websites created with the Stanford Sites Jumpstart service; for these, contact Stanford Web Services through your website "get help" section, and we will create a development site for you.)

If your custom Drupal site is not on Stanford Sites, but is hosted elsewhere at Stanford or beyond, make sure that the new site has all the same modules as the production site. 

Warning: If the modules do not match, your restore will fail, and your new site may be unusable.

2. Start with a clean new site

You should start your new site with a clean database and files; in other words, the new site should have no content. This copy process does not necessarily remove old content and may simply add to any existing content on the new site. 

Step 4: enable modules

You will need to enable Backup and Migrate and Backup and Migrate Files modules on both the production and the new sites. Follow these directions for both sites:

  1. Navigate to:  Modules  (admin/modules)
  2. Check the select boxes for both the Backup and Migrate and the Backup and Migrate Files modules
  3. Scroll to the bottom of the page and click Save configuration

Step 5: create a backup from the production site

Starting on your production site, create backups of both the database and the files.  The database holds the majority of the content and configuration information. The files consist of any images and files, such as PDFs, that have been uploaded to the site.

Backup the database

  1. Navigate to Backup and Migrate at Configuration > System > Backup and Migrate (admin/config/system/backup_migrate)
  2. On Backup > Quick Backup, select options as follows:
    Backup from Default Database to Download using Stanford Sites Profile
  3. Click Backup now
  4. A database copy file will be created with a suffix of mysql.gz.  Save File and click OK.
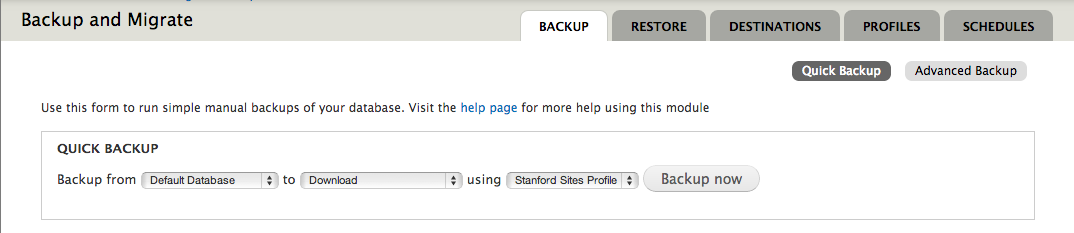
Screenshot of Backup and Migrate database

Backup the files

  1. Start again at Backup and Migrate at Configuration > System > Backup and Migrate (admin/config/system/backup_migrate)
  2. Under BackupQuick Backup select options as follows:
    Backup from Public Files Directory to Download using Stanford Sites Profile
  3. Click on Backup now
  4. A files archive file will be created with a suffix of tar.gz.  Save File and click OK.
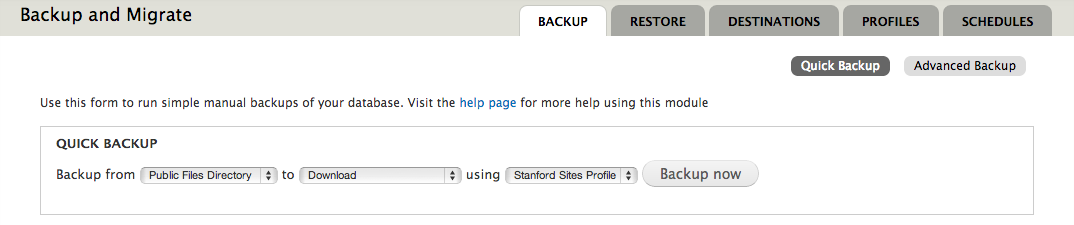
Screenshot of Backup and Migrate files

The Backup and Migrate modules should have downloaded two files onto your local machine: 

  1. A copy of the production database 
  2. An archive of the files from the production site

The database copy will have a suffix of mysql.gz, and the files archive will have a suffix of tar.gz. You will use these downloaded files to populate your new site.  For this, use the restore process, which is the reverse of the backup process. 

Step 6: populate the development site 

In the restore process, you will replace the current database and files on your development website with the database and files from the production website. Starting on your development website:

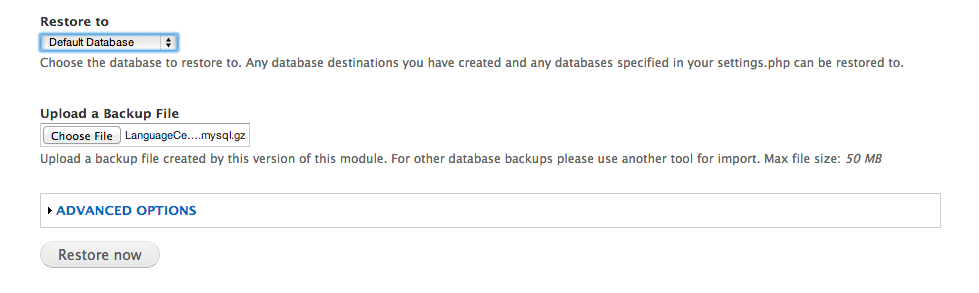
Restore the database

  1. Navigate to Backup and Migrate at Configuration > System > Backup and Migrate (admin/config/system/backup_migrate)
  2. Click the Restore tab, and select options as follows:
  3. Select Restore to Default Database 
  4. Under Upload a Backup File, click on Choose File to bring up the file manager for your computer
  5. Select the database file you downloaded from the production site (that's the msql.gz file)
  6. Click on Open to stage the file for loading
  7. Click on Restore Now to replace the current database with the database from the production server
Restore the files

  1. Again, navigate to Backup and Migrate at Configuration > System > Backup and Migrate (admin/config/system/backup_migrate)
  2. Click the Restore tab, and select options as follows:
  3. Select Restore to Public Files Directory 
  4. Under Upload a Backup File, click on Choose File to bring up the file manager for your computer
  5. Select the tar file of the files you downloaded from the production site (that's the tar.gz file)
  6. Click on Open to stage the file for loading
  7. Click on Restore Now to replace the files on your website with the files from the production server
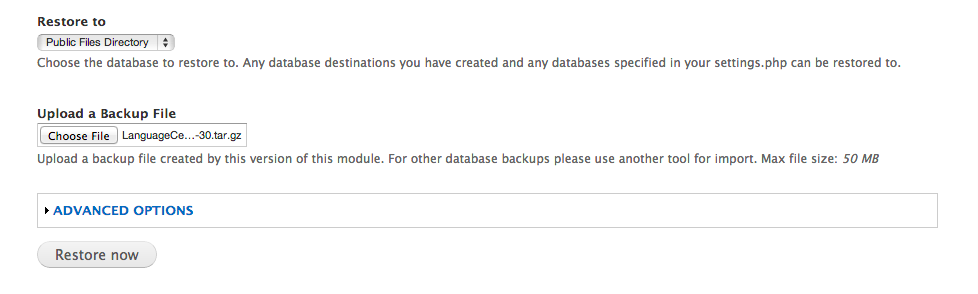
Screenshot of Backup and Migrate Restore files

Step 7: test your work

Once you've migrated both the database and files onto your new development website, it should be ready to go. Click around on the new site, and make sure it functions as expected.

Congratulations! You did it!

Troubleshooting

  • If the cloned site doesn't appear: The site may need more processing time, or you may need to clear the cache. If the site is not responsive, log in to the server and clear the cache from the command line (e.g. drush cc all). If this site is on the sites.stanford.edu hosting, you can submit a HelpSU for this request.
  • If the Migrate Files fails: This could be due to the large amount of space required by the files (e.g. Max-execution time exceeded). 

More information

Related Posts

The Pathologic Module assists with broken links in your content. Read more on this post about how to configure Pathologic.

Posted in:
Caryl Westerberg Posted by Caryl J Westerberg on Tuesday, August 13, 2013 - 8:21am

Do you have courses on ExploreCourses that you’d like to appear on your site? Are you adding these courses by hand every term? If so, check out the Stanford Courses module.  

This module, created by our intrepid developer, John Bickar, at Stanford Web Services, uses RSS feeds to import courses from  https://explorecourses.stanford.edu/ and can display them on your site.  If your website is on the Stanford Sites service, this module is already installed for you. Otherwise you can download it from the Stanford Drupal Features server at: http://drupalfeatures.stanford.edu/project/stanford-courses.

Once installed on your site, you can find documentation for the Stanford Courses module on your site at: admin/help/stanford_courses.

How it works:

To use the Stanford Course Importer you’ll need to create a Stanford Course Importer node and give it a feed URL that specifies the search criteria for the courses to import from Explore Courses. The importer retrieves course information, and for each course, creates and populates a course node with the course information.

Creating the Stanford Course Importer and importing courses

Before starting, be sure to have the following information ready:

  • Title of your course importer

  • Feed URL from explorecourses.stanford.edu

  • Optionally, a description of your importer


Get the feed URL:

  1. Navigate to http://explorecourses.stanford.edu/

  2. Enter the search criteria which will list the courses you wish to import

  3. Your search will result in a long URL like this being displayed in the address bar of your browser:
    https://explorecourses.stanford.edu/search?view=catalog&page=0&q=FINANCE&filter-catalognumber-FINANCE=on&filter-coursestatus-Active=on

  4. Copy that URL from your browser's address bar for use as your feed URL


Create the course importer:

  1. From the Admin Menu, Navigate to: Content > Add content > Stanford Course Importer (node/add/stanford-course-importer)

  2. Paste the feed URL from your search at explorecourses.stanford.edu

  3. Optionally, enter your description of your importer in body text area

  4. Scroll to the bottom of the page and select “Save”

Upon first saving the course importer, the importer will immediately import the items from the feed.  Be prepared, this may take some time.


Verify the import

To verify that the importer imported the course you were expecting, first verify that the number of nodes created corresponds with what you expect. This number should display when the import finishes.

To check that the courses imported are the ones you expect:

  1. Select “Content” from the Admin Menu to bring up the content page

  2. Under “Type” filter select “Stanford Course.”  

  3. Click on “Apply”

  4. If necessary, sort by date by clicking on the “Updated” column header

  5. Check that the most recent courses reflect the information that you expected

Updating the importer

Did you forget to add a tag to the courses you imported?  Maybe you imported the wrong feed?  Not to worry. Here’s how to update or change the importer and the items you’ve imported.

  1. Find the Stanford Course Importer node you originally used to import the items.

    1. Select “Content” from the Admin Menu

    2. On the content page, under “Type” select “Stanford Course Importer”

    3. Click on “Apply”

    4. Scroll through the list until you find the importer to update

    5. Select the importer by clicking on the title

  2. Delete all the courses imported using this importer

    1. On the importer node, select the “Delete Items” tab

    2. Click on “Delete” to confirm

  3. Make your changes

    1. On the importer node, Select “Edit”

    2. Make your changes to the importer

    3. Scroll to the bottom of the page and click on “Save” to save your changes

  4. After saving, import the courses with the new criteria

    1. Select “Import”

    2. Click on “Import” to confirm

Tagging Courses in ExploreCourses

Courses in ExploreCourses may be grouped using tags. When creating the feed URL for courses to import, you can use these tags to identify which courses to import. Instructions for tagging courses in ExploreCourses are at:

http://studentaffairs.stanford.edu/registrar/staff/course-tagging

That's all, folks

Good luck! If you use the Stanford Courses module on your website, let us know how it works for you in the comments below. Feedback and questions are always welcome.

Posted in:
Caryl Westerberg Posted by Caryl J Westerberg on Tuesday, July 30, 2013 - 9:07am

Over a weekend in mid-July several members of Stanford IT Services turned up at the OpenWeb conference held at the Paypal Town Hall in San Jose. This conference, the brain child of John Foliot,  had its roots at Stanford.  Although a variety of sessions were available, this conference seemed to concentrate on accessibility.

Why accessibility?

What I found amazing and wonderful was the number of white canes at this conference. This conference welcomed an amazing number of blind and otherwise disabled people, a group of people whose needs we must consider when developing our web sites and applications.

In his presentation, Ted Drake from Intuit Accessibility, says that for an app or website to be accessible, it must be perceivable, operable, and understandable. That is, a screen reader can read the text; there's no text in the images; you can swipe, tab, and use the buttons even when the screen reader is enabled; and the order in which you navigate the page makes sense.

Have you tried navigating your website or app with just a screen reader? Could you do it? My guess is that unless you built your site with accessibility in mind, it'll be challenging or even impossible to navigate with a screen reader.

As I consider this man who sat next to me with his white cane folded up under his arm, navigating his iPhone by listening to the screen reader through his headphones, I realize that for me, the big take-away from this conference was that accessibility must become one of our priorities as we develop for the web.

Posted in:
Caryl Westerberg Posted by Caryl J Westerberg on Monday, July 8, 2013 - 9:00am

You may be asking yourself, how do I add a block to a sidebar or other region, and how do I get it to display on the correct page? In this post I'll explain how to use the Context module to do just this.

Blocks are a great way to display content in a more structured way on your page. A block is a may be created with a view, as bean, or a simple block. By placing blocks in regions, you can get different layouts. If you want a sidebar or other region to display on your site, you simply need to add a block to the desired region (provided by your theme) and that region will appear once it has content inside of it. If your site is on Stanford Sites your site will have regions such as first (left) and second (right) sidebar.

Drupal almost always gives you several approaches for anything you do. Putting a block in a region is one of those cases. One approach is to use the Blocks module at Structure > Blocks; a second approach is to use the Context module at Structure > Context. At Stanford Web Services, we prefer to define contexts for placing blocks because they provide more flexibility and functionality than what we get on through the Blocks module.

How Context Works

Context uses an “If ... then” approach to placing blocks.  The Conditions are the “If,” and the Reactions are the “Then.” So, for example, if a condition, such a URL path for a page, is met, then the context will display specific blocks in designated regions on that page.  

Using Context, you can designate a whole set of blocks to display, for example, on any events related page. To do this you might define all events-related pages with a common base URL such as:

URL

Page description

https://mysite.edu/events

Landing page for events

https://mysite.edu/events/my-event

Page for a specific event

Then you’ll create a context at Structure > Context which will have as one of it’s conditions a path.  The path would be designated as:

Path

Description

events

Landing page for events

events/*

All individual event pages

The Reactions, for this example, would be to designate a block or set of blocks to display in one or more regions, such as the sidebar, on the events-related pages.

Using Contexts to Add Blocks to Regions

Check Your Setup

  1. To verify that both the Context and Context UI modules are enabled, navigate to the modules page.  From the black admin menu, select Modules.

  2. If not checked, check the boxes for both Context and Context UI modules.

  3. To verify you have the permissions to administer contexts, from the black admin menu, navigate to the permissions page at:
    People > Permissions

  4. If not checked, check the box that gives your role the Administer contexts permission.

Create a Context

  1. Navigate to the context page from the black admin menu:
    Structure > Context

  2. Click on + Add.
    This will bring up the Add a new context page

  3. Enter a name for your context. This must be computer readable so you’ll use lowercase letters, dashes or underscores, and no spaces.

  4. Enter a tag. This optional tag is used to group similar contexts on the Context UI page.

  5. Enter a description. This optional field allows you to describe a context in human readable terms.   

  6. To add conditions for your context, click on the <Add a condition> drop down, and select Path.  

  7. This will bring up a text edit field. Enter paths, one per line, that describe where you want the context to be effective.  For this example enter:
    events
    events/*

Add Reactions (Blocks) to Your Context

  1. To add reactions, click on the <Add a reaction> dropdown menu

  2. Select Blocks.

  3. This will bring up a long form listing all the regions available on your site.  In the column to the right of this list, about halfway down the page, is a scrollable list of blocks. Use your mouse to scroll through this list and select the blocks you wish to place in a single region.

  4. In the center column, click on the +Add for the region in which you want to place the blocks, and the blocks should appear in the list for that region.

  5. Drag the blocks into correct order with the +. (Note: experience has shown that even if the blocks initially appear in the correct order, upon saving, they may not stay. To pre-empt this, simply move them around and back into the correct order before saving.)

  6. Once you’ve finished putting blocks into regions, click on Save.

  7. Verify your work by navigating to a page described by the conditions in the context.

Posted in:

Pages

Subscribe to Caryl J Westerberg's Blog Posts