Skip to content Skip to navigation

Site Retired

As of May, 2022, this website is no longer updated and has been replaced with a static copy.

Cynthia Mijares's Blog Posts

Cynthia Mijares Posted by Cynthia Mijares on Monday, September 15, 2014 - 8:47am

Let's say your co-worker left Stanford or the grad student working on your website is no longer here. I'll walk you through the steps to either remove their editing privileges or cancel their account.

After logging in the your website, navigate to the People page.  In Stanford Sites Jumpstart products, go to the Site Actions menu and choose Manage Users.

Remove editing permissions

  1. Find the User account and click the Edit link
  2. In the Roles section of the screen, uncheck any administrator or editor role assigned to the user.
  3. Click the Save button at the bottom of the screen.

Cancel a User's account

  1. Find the User account and click the Edit link
  2. At the bottom of the screen, click the Cancel account button.
  3. Now you have four options to choose from.  The recommended options are to Disable the account and keep its content or Delete the account and make its content belong to the Anonymous user.
  4. Select the method to cancel the account then click the Cancel account button.

Cancel account

Posted in:
Cynthia Mijares Posted by Cynthia Mijares on Thursday, August 14, 2014 - 2:40pm

We are excited to announce the latest modules included with websites created using the Stanford Sites tool.  For a complete list of modules included on Stanford Sites, view Included Drupal Modules.

Look for future Module of the Day blog posts highlighting each module, use, and configuration.

Drupal 7

Drupal 6

Posted in:
Cynthia Mijares Posted by Cynthia Mijares on Monday, July 7, 2014 - 1:54pm

Google is always improving!  So, here's an update to my last post on how to add a Google map to your website.

Many websites have a "Contact" or "Directions" page that requires a map. You can use Google Maps to create a customized map and embed it on your webpage. 

Creating a Google Map

  1. Log into your Google account.
  2. Navigate to Google Maps.
  3. Enter the location in the search bar and press enter/return on your keyboard.

Share or Embed a Google Map

  1. In the lower right corner of the browser winder, click the gear button and select Share and embed map

  2. You will get a two options, Share link or Embed map.  
  3. To share the map link, select the link and add that to your website so users can click to see a Google map.

  4. To embed the map in your website, click the Embed map tab. Select the iframe code provided by Google.

  5. Go the the webpage where you want to embed a Google Map.
  6. Click the Edit tab.
  7. Be sure the Text format is set to Full HTML. Then in the Body field paste the embed code.
Posted in:
Tags:
Cynthia Mijares Posted by Cynthia Mijares on Monday, April 21, 2014 - 9:02am

Taxonomy Manager is a simple module designed to easily manage taxonomy terms using a friendly interface.

In this use case, we have a site with several taxonomy vocabularies and I want to add to/edit one of them.

Add terms to an existing taxonomy vocabulary

  1. Enable the Taxomony Manager module.
  2. From Structure > Taxonomy Manager, select the Vocabulary you want to work with.
  3. In the Toolbar, click +Add to add additional terms.
    Taxonomy Manager Toolbar
  4. Add new Terms, one per line then click the +Add button.

Add taxonomy terms

Arrange terms in a particular order

Once I added terms my Article Audience terms looks like this:

Article Audience terms

Select the term you want to move and use the up/down arrows to reorder them.

You can also use the double arrow pointer to nest terms.

Move taxonomy terms

Results look like this:

Move taxonomy terms results

Remember to add this taxonomy field to a content type to categorize your content.  Happy Drupaling!

Posted in:
Cynthia Mijares Posted by Cynthia Mijares on Monday, March 24, 2014 - 10:01am

Taxonomy.  What is it and why should I use it in my Drupal site?  In this blog post I will introduce you to the Taxonomy module.

By definition, taxonomy is the division of things into ordered groups or categories. In this use case, we have a site with many pages and I want to specify certain pages for students and other pages for faculty or staff.

Create a taxonomy vocabulary and terms

  1. Enable the Taxomony module.
  2. From Structure > Taxonomy > Add Vocabulary, create a new Taxonomy Vocabulary.
  3. Once your vocabulary is created, click add terms.
  4. Add a term and optional description.  You have the option to Generate automatic URL alias which will give you a page of all the items tagged with this term. Then click Save. Repeat this step for each additional term.

Taxonomy terms

Add taxonomy field to a content type

See a previous post to add new fields to a content type as a reference.

  1. Select a field type of Term reference and a widget of Check boxes/radio buttons or Select list.  Autocomplete term widget (tagging) is used when you want to allow the user to add their own terms.
  2. Choose the Vocabulary to reference then click Save field settings. Set any additional settings then click Save settings.

Next time you create or edit that content type, you will have the option to categorize it with the term(s) you created. You can place the term ID URL in a menu and easily access content tagged with that term ID.

Articles tagged with Staff taxonomy term

Going further with Taxonomy

In addition to seeing a taxonomy page for each term, you can use your taxonomy terms to control what shows up in a filtered view, but that's a tutorial for another day.

Posted in:
Cynthia Mijares Posted by Cynthia Mijares on Tuesday, January 14, 2014 - 8:06am

Need to restrict access to some content on your site? With the Content Access module, you can control viewing, editing, deleting permissions on your site by specific content types. Here's how to set it up.

Content access control by content type

  1. Log in to your website.
  2. From the admin menu, navigate to Modules.
  3. Enable the Content Access module.
  4. Rebuild permissions - this may take awhile.
  5. From Structure > Content types > Edit the specific content type you want to control.
  6. Click on the access control tab.

You can select the view, edit, and delete permissions based on the user role.

Role based access control settings

Content access control by content node

Optionally you can enable per content node access control settings. If enabled, a new tab for the content access settings appears when viewing content. You have to configure permission to access these settings at the permissions page.

  1. Navigate to the page you would like to protect.
  2. Click the Access Control tab at the top of the content area.
  3. In Role Based Access Control Settings > View any stanford_page content, uncheck anonymous user.
  4. Click Submit.
  5. Double check the success of WebAuth protection by viewing the page in another browser.
Posted in:
Cynthia Mijares Posted by Cynthia Mijares on Thursday, January 9, 2014 - 8:00am

Welcome back! This is the blog post number ten in a series on how to create a Drupal 7 personal website using Stanford Sites. Last time we learned how to create a new content type. In this post we'll customize the node edit form.

Customizing the node edit form lets you reorder fields so that they are presented to your content creators in a more intuitive way. Think about how your content creators will be adding information for this particular content type, and try to order the fields in the most logically, related way.

Manage the node edit form

  1. From the admin menu bar, navigate to Structure > Content types > Basic page > Manage form.
  2. On the Manage form page, you can:
  • Click and drag the double-pointed arrow to re-arrange the order fields.
  • Check the Hide option to hide the field from the node edit form.
  • Use the double-pointed arrow to drag fields to a different Region or click on the region box arrow to move a field to the Main column, Right region, or Footer region of the edit form.

When you are finished editing, remember to click the Save button.

Manage node edit form

Create a field grouping

You can also group fields into collapsible field groupings for a better user experience in the node edit form.

  1. From the admin menu bar, click on Modules and enable the Fieldgroup module. Click Save configuration.
  2. From the admin menu bar, navigate to Structure > Content types > Basic page > Manage fields.
  3. On the Manage fields page, Add new group.
    Add new group
  4. Give your group a Label and Group name.
  5. Click the Save button.
  6. Once you save the Content type, you will see the new group listed with the rest of the fields.
  7. Use the double-pointed arrow to drag fields in a different order and nest fields under groupings.
  8. When you are finished editing, click the Save button.

Manage fields

Edit a Fieldset

The fieldset is set to be collapsible and required by default.  This can be edited by clicking on the gear button.  Options include:

  • Update the field group label.
  • Change the fieldgroup settings to open, collapsed, or collapsible.
  • Mark group for required fields.
  • Add extra CSS classes.

When done, click the Update button. Then scroll to the bottom and click the Save button.

Edit fieldgroup

Check it out!

Now when a new Basic page is created or edited, the image field is now in a collapsed fieldgroup called Advanced. Click Advanced to open and edit the additional fields. Then click Advanced again to collapse the fieldgroup.

Advanced field grouping

Cynthia Mijares Posted by Cynthia Mijares on Friday, December 13, 2013 - 1:41pm

You want a personal site that easy to maintain and edit with potential to add dynamic content and wonder how to get started?  Stanford Sites is an awesome product using Drupal technology.

From the Welcome screen, you can easily create a site menu with a few pages to get you started.  Typically a personal site will have the following pages:

  • Home
  • About
  • My Work/ My Projects
  • Publications
  • Contact

Create your site architecture

  1. Create a new page (https://people.stanford.edu/YOUR-SUNETID/node/add/page).
  2. From the Menu settings, check the box to Provide a menu link.
  3. Be sure the Parent item is <Main menu>.

Be sure to check out other blog posts in the Getting Started on Stanford Sites series to help you build your Drupal site.


Cynthia Mijares Posted by Cynthia Mijares on Thursday, December 5, 2013 - 8:01am

Better late than never for a BADCamp wrap-up! This year I was able to attend both the Higher Ed Summit on Friday and conference sessions on Saturday at Bay Area Drupal Camp. My personal highlights are below.

Higher Ed Summit

Collaboration Drupal training for researchers

Quinn from UC Berkeley presented some tips for us to train researchers on how to use Drupal.  Drupal installation is a big barrier to overcome. 

  • Researchers just want to focus on their research
  • Drupal terminology is a new language (blocks, menus etc.)
  • Visual components are really helpful at a second meeting
  • Find the right balance and when to present warnings to the client – we don't want to scare them off
  • Want to establish a good workflow in creating the structure correct the first time around
  • Examples are crucial in deciding structure to go forward with (content types and views)

Benefits of Cloud Hosting

Jeff from Pantheon shared with a new way of thinking about our University websites.

  • Universities are using websites primarily for marketing
  • Think of websites as a utility like electricity instead of something to build and maintain
  • Take advantage of Pantheon cloud hosting – one less thing to worry about

It was a great to share ideas and be inspired by the work that other folks are doing. 

Things that sparked my interest

  • PP Profile - manipulate images in the WYSIWYG with ckeditor 4
  • Top Shelf Modules - work actively with maintainers to improve code quality, consistency, documentation, support issue queue questions, push patches and set standards which makes contrib better for the Drupal community.
Posted in:
Tags:
Cynthia Mijares Posted by Cynthia Mijares on Thursday, October 24, 2013 - 10:55am

Welcome back! This is the blog post number nine in a series on how to create a Drupal 7 personal website using Stanford Sites. Last time we learned how to add custom fields to your content type. In this post we'll look at why you may want a new content type and how to create one.

By default Drupal provides a couple content types: basic page and article. You can create your own custom content types to organize specific kinds of information in groupings that make sense for your site and your content. For example, a department might need to organize fields to represent people, news, or events. Having a separate content type will make it easier for you to display the fields of that content on a separate page or perhaps a custom view. Custom content types also enable you to stay more consistent with the information you are inputting in your website because it creates a standardized node add form for that particular content type that prompts you to fill out your custom fields. So, let's look at how to create a new custom content type.

Create a new Content type

  1. From the admin menu bar, navigate to Structure > Content type > Add content type.
  2. Give your Content type a Name.
  3. In the Description field, describe this content type. This text will be displayed on the "Add new content" page.
  4. Configure content type settings then click Save (see below).

Content type name and description

Content type settings

Automatic title generation

This setting is disabled by default. The title can be set to automatically generate based on the pattern set using an available syntax [token].

Automatic title generation

Submission form settings

This tab gives you an opportunity to change the field label title and set preview options.
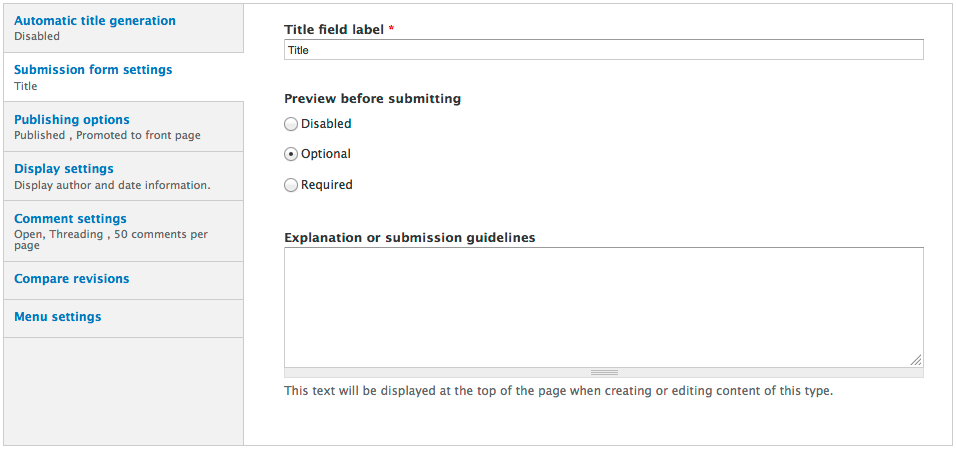
Submission form settings

Publishing options

This tab sets defaults for each new custom content type node created. 

  • Published: Published nodes will be live on the Web when you click Save.
  • Promoted to front page: If checked, all your custom content type nodes will appear on the home page (if you haven't set the front page of your site).
  • Sticky at top of lists: In general, Articles are ordered from newest to oldest.  This option will do the same thing for your content type.
  • Create new revision: If checked, all edits are saved as a revision.  You will have the ability to revert to a previous version. Revisions are great because if you accidentally save a change, you can revert back to an older version.

Publishing options

Display settings

This setting tab is where you can choose to display or not display the author and date information for each content type node created.
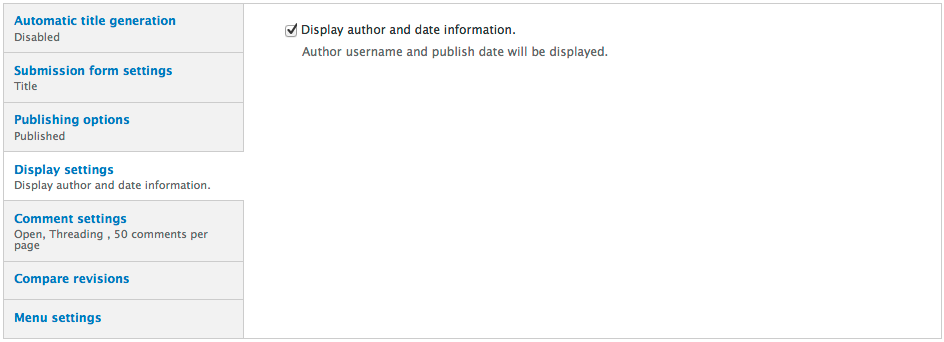
Display settings

Comment settings

You can opt to have comments open, closed, or hidden from this content type.
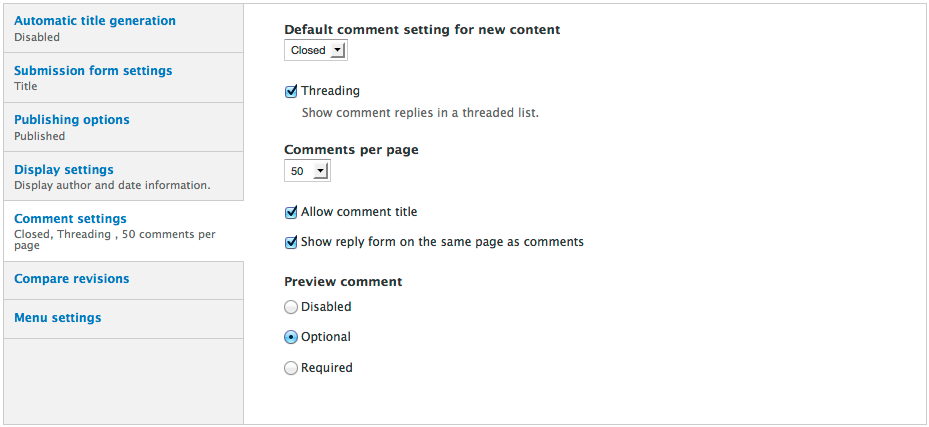
Comment settings

Compare revisions

Choose whether or not to allow revisions for this content type and how much content will display in a comparison preview.

Compare revisions

Menu settings

Choose which menu will be available to choose for this content type.  You can also set a default menu for this content type.

Menu settings

After going through all the content type settings,  click the Save content type or Save and add fields button.

Save button

What's next

After you've created your custom content type, you can add fields to it.  Make sure to check out my blog post on adding new fields to a content type, Getting Started on Sites: Adding New Fields to Your Content Type.

Pages

Subscribe to Cynthia Mijares's Blog Posts