Skip to content Skip to navigation

Site Retired

As of May, 2022, this website is no longer updated and has been replaced with a static copy.

Cynthia Mijares's Blog Posts

Cynthia Mijares Posted by Cynthia Mijares on Tuesday, October 8, 2013 - 9:09am

Welcome back! This is the eighth blog post in a series on how to create a Drupal 7 personal website using Stanford Sites. Last time we learned how to create image styles to enhance your site's images. In this post we'll look at how to add custom fields to your content type.

By default, Drupal has two content types, Article and Basic page. What if you wanted an image field, a document attachment field, or a taxonomy field to be available on these content types? Let's walk through the steps to add a new field to an existing content type.

What Field types are available?

There are several field types to choose from.  Here's a brief overview of each field type.

  • Boolean: Allows users to choose one of two options, using either radio buttons or an on/off checkbox.
  • Date: Recommended for most installs. Stores the date in the database's native date format (YYYY-MM-DD HH:MM:SS).
  • Date (ISO Format): Stores the date in an ISO format (YYYY-MM-DDTHH:MM:SS).
  • Date (Unix Timestamp): Stores the date as an integer.
  • Decimal: Allows exact decimal values.
  • File: Allows users to upload a file (note that there's a separate field type for images). It's useful if you want to attach a document, such as a PDF.
  • Float: Allows floating-point values. Floating-point values represent approximate decimal values.
  • Image: Allows users to upload images and attach them to the node. These images could be displayed in their raw form, hidden and then inserted into the body using the Insert module, or hidden and called using a node template. This field is extremely flexible and can be tailored to your needs.
  • Integer: Allows users to enter whole numbers, such as years (e.g. 2012) or values (e.g. 1, 2, 5, 305). It does not allow decimals.
  • List (float): Allows floating-point values from a predefined list. Floating-point values represent approximate decimal values.
  • List (integer): Allows whole number values from a predefined list.
  • List (text): Allows text values from a predefined list.
  • Long text: Allows users to enter chunks of text in a textarea field with multiple rows, with no summary option (see below).
  • Long text and summary: Allows users to enter chunks of text in a textarea field with multiple rows, with an option to enter a summary, or brief excerpt that describes the text. This could be used if you were creating a blog with short excerpts on the index page - the post itself would be in the long text field, and the brief excerpt that displayed on the index page would be pulled from the summary field.
  • Term reference: Links the node to a vocabulary. After this is added, tags from this vocabulary can be selected on each node that uses this content type.
  • Text: Allows users to enter text in short, row-less fields. This is ideal for small phrases, since long sentences can't be seen in the small text field.

Adding a new field to your content type

In this blog post, I'll show you how to add an Image field to the Basic page Content type.

  1. From the admin menu bar, navigate to Structure > Content types > Basic page > Manage fields.
  2. In the Add new field section, give the field a label name (Image). Keep this simple and unique for the Content type.
  3. Then click on the Select a field type arrow and choose the appropriate field type (Image).
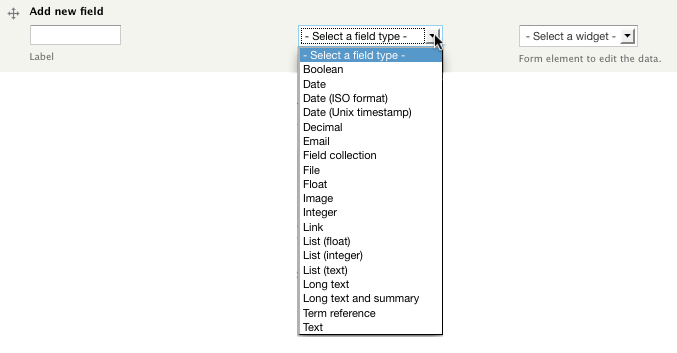
    Add new field

  4. After selecting your field type, a Widget type is automatically determined based on the field type.  Note: If you click on the arrow, you may see other options based on the field type you select.
  5. Press the Save button.
  6. On the Field Settings page, you can set a Default image. If no image is uploaded on the node edit form, this image will be shown on display.
  7. On the Basic page Settings page, additional field setting options are available based on the field type selected.
  8. Click the Save settings button.

Manage how the field displays on the node

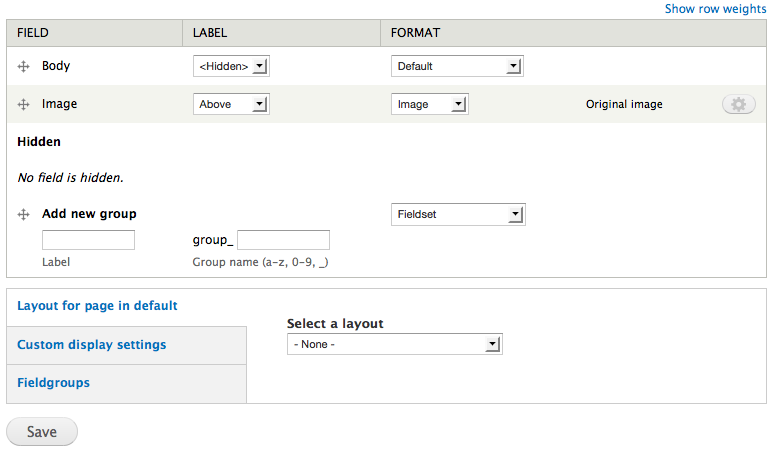
  1. From the admin menu bar, navigate to Structure > Content types > Basic page > Manage display.
  2. Click the field Label arrow to change label position and whether or not to show a label on node display.
  3. Click the field Format arrow to choose a formatting option.
  4. Click on the gear button to change the default image size on node display.
  5. When finished, click the Save button.

Manage Image field display

Next time, I'll go over creating a new Content type.

Cynthia Mijares Posted by Cynthia Mijares on Thursday, August 8, 2013 - 9:09am

Welcome back! This is the seventh blog post in a series on how to create a Drupal 7 personal website using Stanford Sites. Last time we learned how to insert a Google map into your webpage. In this post, we'll walk through creating Image Styles.

By default, your Drupal site gives you the option to change the look of an uploaded image to thumbnail, medium, or large. These size presets are called image styles. You can create your own image styles to have custom-sized options for your images that you can use anywhere on your site. In this blog post I will use the Article content type as an example.  You may also use image styles on other content types and views that already exist or one that you've created for your site.

Creating an image style

  1. Log in to your Drupal site as an administrator.
  2. Navigate to Configuration > Media > Image styles.
  3. Click the + Add style link.
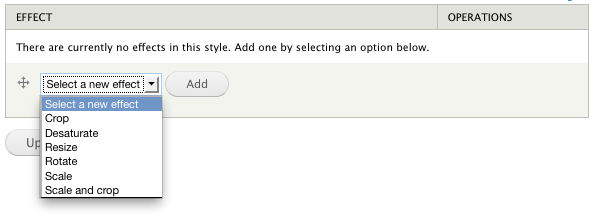
  4. Give the image a Style name then click the Create new style button.

    Style name

  5. On this screen you can compare the original image to the new image size you just created.  At first they are identical. You will need to add an effect.

    Effect

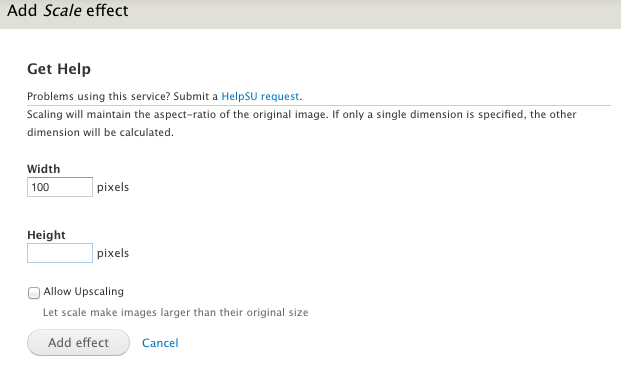
  6. I'm going to choose to Scale my image and set my width to 100 pixels. This will resize the image based on the width I have specified (100px). If you leave the height blank, it will be calculated automatically to preserve the aspect ratio of the image. Click the Allow Upscaling checkbox if you want smaller images to expand to meet the 100 pixel width setting.  I usually do not use upscaling because images tend to get blurry, pixelated, and just don't look as good. When done, click the Add effect button.

    Add effect

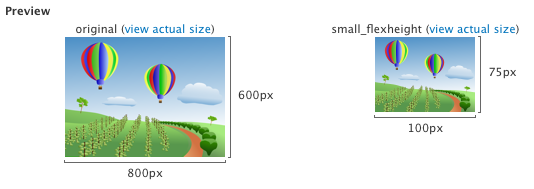
  7. The preview now reflects the new image effect.

    Preview

Also, you may want to explore the scale and crop effect – we use this regularly in many of our image styles, as it allows you to have a custom width and height (like a square for example) and a scaled image. This is helpful for creating thumbnails of particular dimensions to have a uniform effect in a list or grid view.

Next we'll look at how to update, delete, and use our image styles.

Updating an image style

  1. Navigate to Configuration > Media > Image styles.
  2. Under the Operations column, click edit for the image style you want to update.
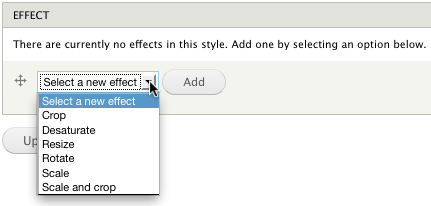
  3. There are several options you can do: change the Image style name; edit or delete the existing effect; or Select a new effect.
  4. After making changes, click the Update style button.

Deleting an image style

  1. Navigate to Configuration > Media > Image styles.
  2. Under the Operations column, click delete for the image style you want to remove.

Using an image style in Content types

  1. Navigate to Structure > Content types > Article > Manage display.
  2. Click on the gear next to the image field where you want to change the image style.

    Gear button

  3. Under the Format settings, click the image style arrow and select a new image style (e.g., small-flexheight).
  4. Click the Save button.

Using an Image style in Views

  1. Add your image field to the view.
  2. Configure the field settings by clicking on the image style arrow and selecting the image style (e.g., small-flexheight).
  3. Click the Save button.
Cynthia Mijares Posted by Cynthia Mijares on Thursday, August 1, 2013 - 9:07am

Welcome back! This is the sixth blog post in a series on how to create a Drupal 7 personal website using Stanford Sites. Last time we enabled the image insert button to insert an image on your webpage. In this post, we'll walk through the steps to add a Google map to your site.

Many websites have a "Contact" or "Directions" page that requires a map. You can use Google Maps to create a customized map and embed it on your webpage. In this blog post I will use the Article content type as an example. You may choose to manipulate another content type that already exists or one that you've created for your site.

Creating a Google Map

  1. Log into your Google account.
  2. Navigate to Google Maps.
  3. Enter the location in the search bar and press enter/return on your keyboard.

Embedding a Google Map

  1. In the upper left corner of the browser winder, click the link button.

    link button

  2. You have a few options from which to choose.

    past or embed link

    Use the first URL code to grab only a link to the Google map. Use the second code if you want to embed the map into your webpage.

  3. For more options, click the Customize and preview embedded map link. You can customize the map size; see a preview of the map; and copy the HTML code to paste in your website.
  4. Go the the webpage where you want to embed a Google Map.
  5. Click the Edit tab.
  6. Be sure the Text format is set to Full HTML. In the Body field paste the embed code.

Like so:

View Larger Map

Cynthia Mijares Posted by Cynthia Mijares on Friday, July 26, 2013 - 10:02am

Welcome back! This is the fifth blog post in a series on how to create a Drupal 7 personal website* using Stanford Sites. Last time we looked at inserting an image on your webpage.

In this blog post, I'll show you how to have more control over how your images appear on your webpages. The Image insert button enables the site editor to insert an image and take advantage of image styles that you can preset. In this blog post I will use the Article Content type as an example.  You may also choose to manipulate another Content type that already exists or one that you've created for your site.

Adding the image insert button

  1. First, manage the Article image field. Go to Structure > Content type > Article > Manage fields
  2. Edit the Image field.
  3. Open the collapsed Insert section and check the Enable insert button.
  4. In the Enabled insert styles section, you can choose what Image styles you would like to use.
  5. You can also set the image Default insert style and add any Additional CSS classes.
  6. Click the Save settings button.

Adding image styles

  1. From the admin menu, go to Configuration > Media > Image styles
  2. Click the + Add style link.
  3. Give the image a Style name.
  4. Click the Select a new effect arrow add a new image size.

    Effect

  5. Assign Width and Height pixel dimensions, then click the Add effect button.

When you insert an image on an Article node, the new image style is also now available.

* Need a personal website? Claim yours on Stanford Sites.

Cynthia Mijares Posted by Cynthia Mijares on Friday, March 22, 2013 - 5:15pm

Have you ever wondered "how do I host my videos on YouTube?" There are a couple of options depending on your audience.

Departmental Videos

If the videos you want to embed are only relevant to your own departmental website then:

  1. Create a Google account for your dept/group using an @lists.stanford.edu email address
  2. Sign in to YouTube using this new Google account.
  3. Click the "Upload" button at the top of the screen.
  4. If this is your first time logging in, you will be asked to "Create a channel" (Be sure to include Stanford in the name of your channel)
  5. Once the channel is created you can "Select files to upload"

Videos for a Broader Stanford Audience

If the videos are of broader appeal to the general public (e.g., guest speakers, faculty presentations, course recordings), we strongly encourage your to consider posting these on the main Stanford YouTube channel instead.  The main Stanford YouTube channel will give much broader exposure to your content and also does not have limitations on the length of videos (individual channels can only upload videos up to 10 minutes in length).

Information about hosting videos on the main YouTube Channel can be found at http://ucomm.stanford.edu/contribute/

Best Practices for Encoding and Naming Videos

Either way, you might also want to consult University Communications' Encoding Specifications data sheet for optimal resolution and encoding for YouTube. There is other information on the University Communications website about speaker releases and key wording your videos which may also be useful.

Posted in:
Cynthia Mijares Posted by Cynthia Mijares on Friday, March 22, 2013 - 11:32am

Welcome back! This is the fourth blog post in a series on how to create a Drupal 7 personal website using Stanford Sites. Last time we looked at attaching documents to our Sites website.

Now that you've got a few pages in your new website, let's make it visually more appealing by adding a featured image. You can either edit an existing page that you've already made, or you can create a new page, which is what I'll do in the following instructions.

  1. First, add a new page (or edit one you already have made). To add a new page, from the Admin menu, Go to Content > Add content > Article

    Create Article

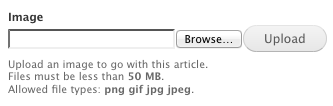
  2. In the Image field, browse your local hard drive for the image you want to use.  Once you have selected the image, press Open then click the Upload button.

    Image field

  3. For accessibility reasons, be sure to include Alternative text. This text will be used by screen readers, search engines, or when the image cannot be loaded.
  4. Fill in the rest of the required fields to create an Article, then click the Save button.

By default, the image will automatically be placed above the main content or Body of the Article.  In my next blog post, I'll show you how to add an image insert button to include images in the body of your article and add a few image styles to customize your site.

Cynthia Mijares Posted by Cynthia Mijares on Friday, March 15, 2013 - 9:00am

Welcome back!  This is the third blog post in a series on how to create a Drupal 7 personal website using Stanford Sites. Last time we looked at using the Quick Steps to get started editing our Sites website.

Now that you've got a few pages in your new website, you may be wondering how to attach a document to a page. First, you'll need to add a new field to the Basic page Content type for file attachments. Then you can either edit an existing page that you've already made, or you can create a new page, which is what I'll do in the following instructions.

Adding a file attachment field to your Content type

  1. Go to Structure > Content types > Basic page > Manage fields.

    Add new field

  2. Add new field and label it something like File attachment or Document.
  3. Click on the Select a field type arrow and select File.
  4. Select a widget should also be File.
  5. Click the Save button.
  6. Set the field settings that will apply to this field everywhere it is used in the website then click the Save field settings.

    Field settings

Adding a file to your Basic page content entry

  1. First, add a new page (or edit one you already have made). To add a new page, from the Admin menu, Go to Content > Add content > Basic page.

    Create Basic page

  2. Fill in the web form fields for Title and Body.

    Title and Body fields

  3. Below your body field is a FILE section. Files must be less than 50 MB and the allowed file types are txt, pdf, doc, docx, xls, xlsx, and rtf.  Click the "Browse..." button to locate the file that you going to upload.  Once you have selected the file, press the "Open" button. The file path will display in the file field.  Click the "Upload" button to upload your file to your page.

    Add a new file

  4. After clicking the "Upload" button, you will see your file.  The description is the text that will display. There are several options that you may choose to display the document.  You can click the "Insert" button to add a link to the document in your body text. You can also check the box in the "Display" column.  This tells Drupal to also display the file below the body field on your page. Should you need to, there is also an opportunity to upload additional documents using the "Add a new file" field below your already uploaded document.

    File information

  5. Finish making your edits to the the page. Don't forget to scroll down to the bottom and click the "Save" button. Your page should look something like this:

    Adding a Document page node

Next time, I'll show you how to add images to your pages.

Cynthia Mijares Posted by Cynthia Mijares on Friday, March 8, 2013 - 9:00am

This is the second post in a series on creating your personal Drupal 7 site using Stanford Sites, a free service provided by Stanford Web Services.  In the last post, we talked about how to request your Drupal site on Stanford Sites.

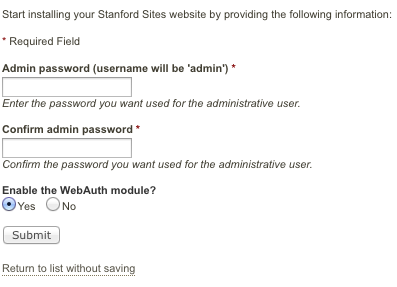
After you request your site, you will receive an email letting you know your site is ready.  Click on the link provided in the email to complete the installation and begin to configure your website.

When the website loads in your browser window, you will see a "Welcome to Your Stanford Sites Website" screen.  First thing you'll need to do is log in as "admin" using the password you created during the initial request.  Once you've logged in as admin, you'll be able to go through the Quick Steps, a block with a set of getting started tasks that will appear on your homepage. The Quick Steps give you shortcuts and initial instructions for getting oriented with Drupal.

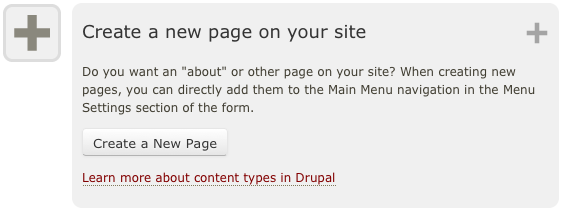
  1. For some instant gratification, you can create a few pages and get a quick navigation menu started. Look for the "Create a new page on your site" step. When you create a new page, you can add it to the Main Menu navigation in the settings at the bottom of your post.

    Create a new page on your site

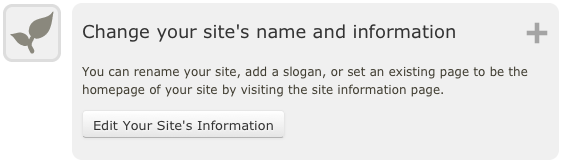
  2. Put your stamp on your new site by changing the site's name and information. Look for the "Change your site's name and information" step.

    Change your site's name and information

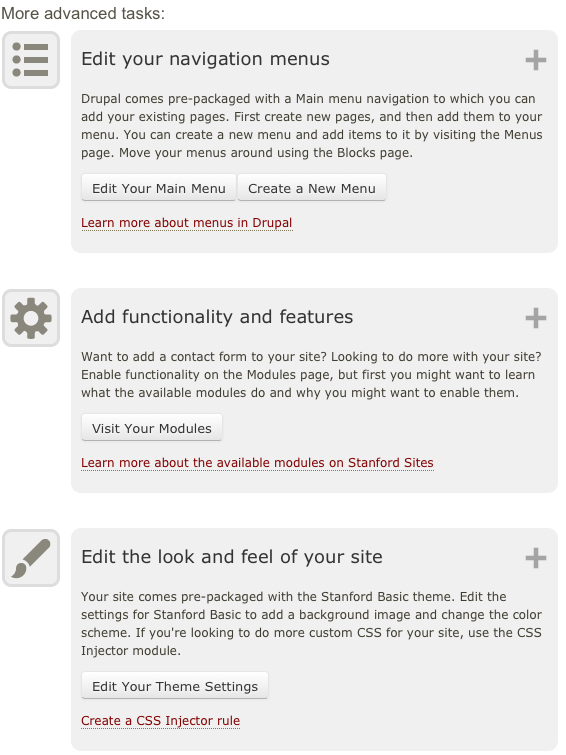
  3. Drupal has the many more features that allow you to make your site as basic or complex as you need it to be. Look for the "Edit your navigation menus" step in order to change your navigation and menus. Look for "Add functionality and features" to change which modules are enabled on your Drupal site. Look for the "Edit the look and feel" step in order to edit your theme settings (check out Megan's post about how to style your Sites site!).

    More advanced tasks

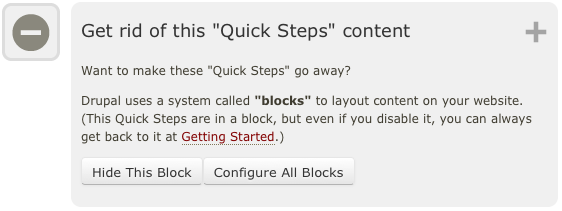
  4. If you are satisfied with your site's progress and want to hide the Quick Steps from your homepage, look for step "Get rid of this 'Quick Steps' content."

    Get rid of this

In the next blog post, I'll show you how to attach a document file to your content.

Cynthia Mijares Posted by Cynthia Mijares on Friday, March 1, 2013 - 9:00am

This blog post is the first in a series on setting up your personal Drupal site on Stanford Sites.

The Stanford Sites Drupal hosting service is a free service for the Stanford community that provides centrally-maintained and supported Drupal modules pre-installed. These modules are hand-selected to support website needs found in our academic environment, so you easily could use it to build your department, group, or personal website. Stanford Sites is available to all Stanford faculty, staff, and students with SUNetID.

  1. To get started, request a Stanford Sites website by visiting sites.stanford.edu/drupal/admin.
     
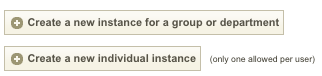
  2. Select "Create a new individual instance" for your own personal site which will reside at http://people.stanford.edu/yoursuidname. If you are requesting a site for your department or group, click "Create a new instance for a group or department" – you will need to already have an AFS webspace in order to do this.

    Create a new individual instance

  3. Once you have selected your option, in this example we have selected the individual instance, you will be taken to a new page to fill out and submit the request form.

    Drupal request form for an individual instance

    Tip: For the user account “admin” you must set a password. Mix upper and lower case letters, numbers, and special characters to create a strong one.

  4. After you click the "Submit" button, it takes up to an hour for your newly requested site to be installed. When the site is ready, you will receive an email from “Stanford Sites” with the subject "https://sites.stanford.edu/sitename site ready".
     
  5. Follow the install link in the email message to complete the installation of your new Drupal site.
     

 Check back for the next blog post that will include easy to follow instructions on configuring your personal Drupal site.

Cynthia Mijares Posted by Cynthia Mijares on Wednesday, January 23, 2013 - 1:44pm

Often we run into a common problem where clients want to have their Staff listed in a particular order not just ascending or descending alphabetically. We can easily solve this using a great module called Draggable Views. I love using Draggable Views!  Here's my quick lesson on how to use this awesome module for Drupal 7.

Step 1 - Build your initial public-facing view.  Let's call it "Staff." This will be the final view that is shown on the site.

Step 2 - Then build a second view and call it "Sort Staff." This will be used to create the custom sort order, and is not ultimately seen on the site.

  • It's important that this be a table view of fields. 
  • Add one or two fields that will help you when creating your custom sort order. In this case I include the first and last names of our staff members.
  • Add a field for Draggableviews: Content
  • Add a sort criteria for Draggableviews: Weight
  • Then change the path to something like /admin/sort-staff
  • Then save this view.

Step 3 - Go back to your "Staff" view to set the sort order based on our "Sort Staff" view.

  • Remove any existing sort criteria that exists (for example, ascending)
  • Add a sort criteria for Draggableviews: Weight
  • In the "Configure sort criterion: Draggableviews: Weight" settings, under the "Display sort as" section, select the new "Sort Staff" (Page) view that you just created.
  • Apply and Save.

Step 4 - Now that you've connected your "Staff" view with the "Sort Staff" view, you can create your custom sort order.

  • Go to your public-facing "Staff" view page.
  • Hover over the view and click the "cog wheel" in the upper right corner.  You should see an "Order view" option. 
  • After selecting "Order view" you can arrange your content by using the draggable double-pointers. 
  • Make sure to click Update!

Voila!  A sorted view just the way the client wants it!

Posted in:

Pages

Subscribe to Cynthia Mijares's Blog Posts